Archive | December, 2013

DIY SKILLZ: Making Kaylee’s Parasol

30 Dec

Hello all!

First off, I’d like to wish the entire Hive a belated Happy New Year! It’s now 2014. The Bighorns are counting down the days to the wedding!

Over the Chrissy break, I decided to start (and finish) a DIY project I’ve been dying to do since Mr Big showed me a particular parasol. This particular project is very much connected to the “geeky” aspect of the wedding.

I documented it in the last post, but just as a reminder – folks, I wanted to make Kaylee’s Parasol:

kaylee and her parasol

Kaylee, the mechanic from the cult TV show Firefly, and her colourful parasol. / Image via The Verse – The Firefly/Serenity Costuming Club.

For those who aren’t in the know, Kaylee is a character from Mr Big’s Favourite.TV show.EVER. This TV show is called Firefly and was actually written by Joss Whedon, the guy who made the biggest superhero film of all time, The Avengers.

As documented in my last post, I could not find anyone who sold Kaylee’s parasol in Australia or was willing to ship it over from America for cheapsies. And so, with that, I turned to the DIY route. Before I begin, let me all just refresh your memories.

The parasol looked like this:

kaylee's parasol

Taken from When Geeks Wed.

First off, I purchased a relatively cheap plain white paper parasol.

plain white paper parasol

A plain white paper parasol purchased from Lantern Shop.

After I received it, I didn’t do anything with it for a little bit because I was scared I would fail and ruin it. During the Xmas break (NB: Merry belated Xmas from the Bighorns!), I sat down and began planning out what to do.

I won’t lie. I didn’t do this project on my own (everyone knows how much I fail at arts and crafts, right?). I got most of my advice from When Geeks Wed, but adjusted it to suit what I needed.

For example, I found that overlaying construction or scrap paper over the parasol and fastening it with scotch tape was much easier than putting it underneath the parasol. I would then trace around the paper to make the swirl needed.

I didn’t take pictures of this part of the DIY process because I had to adjust the swirl a lot before I was happy with it. I found it easier to do the swirl roughly and then just eyeball it until it looked just right.

DIY_kaylee_step 1

The crafting corner I had set up! At this point, I was ready to start painting. Unfortunately, I did the swirl lightly with a blunt pencil, so you can’t really see it unless you look closely.

I then began painting!

I started off as the tutorial instructed – the green swirl.

DIY_kaylee_step 2

As you can see in the picture, it looked rough! I had only put on one coat of green paint by that point. If you do intend on doing this project, I highly recommend a few coats of paint. After I was relatively happy with the green swirl, I moved on to the yellow one:

DIY_kaylee_step 3

Can you see the thickened green paint? Also, you can see the beginnings of the final red swirl!

I forgot to take a picture of the yellow swirl being painted, but it’s all the same anyway! J After the yellow one was done, I started with the red (as you can see above).

Like I said before, a few coats of paint really does do wonders!

Once I was happy enough with the coats of paint, I went over the edges with an “angular shader” brush (basically, a brush with angled bristles). You could probably do the edges with a fine-tipped brush, but I highly recommend the angular shader if you want a smooth finish.

This is what I ended up with:

DIY_kaylee_step 4

The finished product!

I’m quite proud of it! I’ve been getting tonnes of compliments on it and I can’t wait to use it on the day. Mr Big says that I did a very, very good job on it too. So smiles all around!

One thing to note though, when I closed the parasol I had to be careful to make sure it folded properly (don’t worry guys, it did!). The paint makes it a little bit bigger than it was originally when folded, but overall, not much change (other than the nice coat of paint, of course).

What do you guys think? Does anyone else intend on DIY’ing some of their own painted parasols?

(All images personal unless otherwise stated.)

A Tale of Two (Pairs of) Shoes

24 Dec

When I first began thinking about my wedding-day look, I knew one thing to be true.

I’d be wearing white shoes.

I’m a shoe-girl. Clothes change with weight, and I’ve always had problems with my weight, but shoes? Shoes don’t change. They are forever faithful. They can also make or break an outfit, so it was important to me that my shoes make me feel even more fantastic than my jewellery, hair, makeup, or dress.

Unfortunately, I have tiny, tiny feet.

I’m a size 5 to 5.5 in Australia, which roughly translates to a size 36 to 36.5 in EU. It’s difficult to buy fashionable shoes in Australia in that size, so most of my shoe-shopping has been done in discount bins in shoe stores, overseas, or online.

And with that said, I turned online when searching for my “ultimate” shoe. My search didn’t yield much for a few weeks that would be worth putting up on the ‘Bee, but then I stumbled across these babies:

spitfire wedges

The Spitfire wedges from Poetic Licence. / From Hive Member christinamarie890, photography by Idalia Photography.

They’re made by the awesome shoe designers Poetic Licence and were selling on the online store Modcloth. I’ve been stalking Modcloth for forever, and have bought a few bits and bobs from them, so when I saw these babies selling for about $US150 and in my size; I snatched ‘em up!

A few weeks later I got a box from Modcloth and within that box was this fanciful box:

poetic licence carrying case

Can you believe they give you a carrying box? It’s awesome! It’s as if they knew it was for a wedding! / Personal photo.

Inside this beautiful box were these babies:

spitfire wedges instagrammed

I totally Instagram’d my shoes… Ignore the clutter in the background. / Personal photo.

I was extraordinarily happy with my choice. After some breaking in, they’re now totally comfortable to walk around in.

Unfortunately, they’re not so good to dance in.

You see, Mr Big and I have been doing some dance lessons. I won’t divulge any further, but I wore these babies to dance in and found that, though I wasn’t really in pain, my feet were pretty red. Also, I found I didn’t have the much-needed grip you need when dancing. It was also harder to do the more… passionate parts of the dance.

I considered sanding down the bottoms to give it more grip, but the bottoms of the shoes have an absolutely beautiful grip and I couldn’t bring myself to do it.

So enter these som’bitches:

????????????

I am really bad at taking photos. / Personal photo.


I got these on special at a local store called Rivers. Rivers touts themselves as Clothing and Footwear Merchants, and it’s true – they sell clothing and footwear. Most of the clothing and footwear they sell are good for outdoors-y activities, but occasionally they’ll sell fancy footwear for both men and women.

The particular shoe you can see in that photo isn’t selling anymore, but they’re selling similar shoes here in both red patent and black patent for those interested.

Rivers shoes are comfy because of their patented Riversoft leather soles. They’re also roomy, and these particular shoes only have a heel of about 1 to 2 inches, so they’re much easier to dance in.

So with that said – I’ve become a two-shoe bride! (Three shoes if you count the fact that I may want to change into pre-owned flats later in the night.)

Who else is a two-shoe bride? 🙂


One More ‘Til the Shindig

19 Dec

Ah, the one-month mark.

You see, I was hoping to put this sign up, and tell the Hive that the one-month mark isn’t as crazy as most almost-weds make it out to be:

keep calm_one month

Image taken from The Keep Calm-O-Matic.

Then I would be talking about the fact that we’ve got most things done, with only the bare minimum to go, and we’ll see soon be “project free”, with nothing but the days to worry us. And I’ll mention that I’m looking forward to the month going by quickly just so I can get married to the most amazing man in the world.

But, to be honest Hive, I’m freaking out (well, I was).

Mr Big has had work dump a whole lot of stuff on him (he’ll unfortunately have to work over the Christmas period) and we have a lot to do on the DIY front. We also need to hand our song list over to DJ Jeeves (our awesome DJ) and figure out how to place the posters for our ceremony (my coordinator unfortunately hasn’t gotten back to us). We’re still trying to figure out how to schlepp all the band equipment and wedding décor up there with three full cars of people (yes, guys, three full cars of people).

So instead, I’ll put this sign up:

panic_one month

Image taken from Sahil Patma’s Weblog.

However, apart from the logistical and DIY project stress, most of the other details have been sorted!

We’ve basically nailed down the major points on our day-of timeline; all of our official RSVPs have come in; I’ve assembled a contact list for all of the important people (vendors, bridesmaids, groomsmen, ourselves, parents, etc.); we’ve purchased basically all the décor and goods that we need for this shindig; I’ve either already confirmed or are in the midst of confirming times with our vendors; accommodation for all the guests have basically been booked; we’ve bought all the gifts; have all the suits and dresses in order (a part from one or two loose ends); and it’s all looking good.

Now it’s just the payments (which we’ve started on), getting the finer details on the timeline, polishing off the DIY projects, printing out all the place cards and posters, and finally.getting.married! (to the most amazing man in the world! <3)

PHEW.

Wish the Bighorns luck guys!

Part 3: The Invitation Breakdown – Pet Projects!

19 Dec

Finally, the last part of the invitations! I’m sorry it’s so long guys, but I hope this gives you some idea on how to go about giving your guests much-needed information for your destination wedding (or even for a local wedding!).

I hinted in my last post that we had two additional inserts: the Chinese tea ceremony insert, and the Map insert. These two were my pet projects.

The Chinese Tea Ceremony Insert

When we initially began thinking about the invitations, Mr Big mentioned that his Kiwi contingent wouldn’t know where to purchase red envelopes. We decided then, that we would include red envelopes in our invitation for those guests to use at the wedding.

We then had to consider how to tell guests about the Chinese Tea Ceremony. We would only be giving this particular insert to specific guests (mostly family and close friends) but how would we give it to them?

I then came up with an idea of inserting the insert into the red envelope, like a gold ticket in a Willy Wonka chocolate bar (but maybe not as exciting as one…)!

First off, I had to measure the “standard” size of a red envelope:

red envelope measurements1

One of the red envelopes I received for Chinese New Year.

I sent this image to my Cousin Fre in Indonesia, who then bought a bunch of red envelopes for us measuring approximately what I had given: red envelopes

Meanwhile, I went to my handy-dandy Photoshop and constructed this:

insert_chinese-tea-ceremony

The Chinese Tea Ceremony Insert.

It needed to fit inside the red envelope, but still be visible. In the end, I ended up with this:

invitation_proof_inserts

I know you guys have seen this a BAJILLION times, but it’s the best picture I have!

Because the Chinese Tea Ceremony is often considered to be an event for family (and close friends) we were selective in our choosing for who received this particular insert. It worked out well, and those who received this “special invitation” were actually quite excited about the whole thing!

The Map Insert

Another pet project, this one came to me after I realised that our guest may need a map to get around the Hunter Valley. I was in Adelaide at the time and decided on a whim to break out my tablet, Photoshop and open up Google Maps when Mr Big was at work.

I was so gorramn focused on the whole thing that I didn’t take any progress pictures, but hive, if you’ve been on the Bee for a while, you know which tutorial to turn to for awesome maps. 🙂

In the end, I ended up with this:

map_inserts

Top picture, an overview of the Hunter Valley showing reception, ceremony and accommodation; and bottom picture, showing the Hunter Valley Gardens in all its hugeness. I forgot to take the border off the second map. Oops.

We printed them back-to-back and they were a success. Hopefully our guests bring them to the wedding to help them get around!

All-in-all, I’m super happy with how our invitations turned out. I know some of our guests have responded with positives (some people have even told me to start doing invitations for other people, hahah!).

What do you think Hive? Did anyone else have pet projects?

(All images personal.)

Part 2: The Invitation Breakdown – Wedding Essay Galore!

18 Dec

Last time, I chatted to you guys about the envelopes, pocketfolds and the main invitation. Now I’ll go into the inserts which comprised the second-half of the invitation. As I’ve mentioned before, the invitations we wanted to make needed to be informative, especially as our wedding would be a destination wedding for half of our guests (or all, if you’re one to believe that two hours away for a wedding is classified as a ‘destination’ wedding).

As such, we wanted to include inserts which informed our guests about:

  • Details on the Hunter Valley
  • Accommodation
  • Travel
  • The “Wishing Well”
  • An RSVP card
  • The Reception

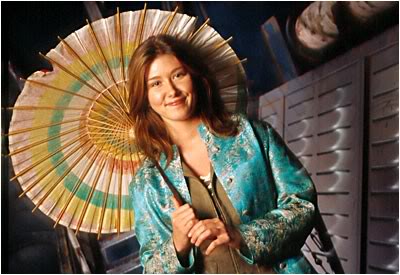
I also wanted an image to come across through the inserts, like this picture right here:

invitation_inserts

My inspiration! / Image taken from Inviting Invitations.

After designing through Photoshop, I realised we had too much information to really put a clear image through (like the one above) so I decided to do it was an image on 30% opacity.

This was our preliminary run of the inserts:

invitation_proof_inner

Who can see the blossom tree showing up through the inserts? And yeah, I know. You’ve only see this image 456,156,981,125 times.

If you look past the heading, you can see a tree showing up through the inserts. It turned out phenomenally in the actual invitations (here, it doesn’t look as good as it was a proof).

Also, you might have noticed that we doubled up travel and accommodation, as those tend to go hand-in-hand (and we didn’t want to have too many inserts. You can also see something peeking out at the top of the details card. That was another separate insert for specific people to attend our Chinese tea ceremony, which I’ll go into in another post:

invitation_proof_inserts

See the red envelope with Buddha on it? That’s the Chinese Tea Ceremony insert. Another thing you must’ve seen 854,264,125,354 times.

You can also see in the above picture one side of our map.

Before I overload you guys with ALL THE THINGS, I’ll start with the basic inserts and go into both the map and the Chinese tea ceremony insert in the next post.

Let’s start from the top then!

The Details

insert_details

The Details Insert.

To my knowledge there isn’t anything private on these inserts. As you can see from this card, we wanted our guests to know where the Hunter Valley was. I’m not sure if the Hunter Valley is as popular as say, the Marlborough wine districts in the South Island of New Zealand, or the Napa Valley in California, so I wanted to make sure that our guests knew the full extent of where we’d be having the wedding.

I also created a map outlining the distance from Sydney to the Hunter Valley so that guests get a clearer picture geographically.

screenshot_map

An initial design of the map.

You can also see that we outlined two very important things: (1) there would be a wine tour if guests wanted it, but they’d unfortunately have to pay, and (2) lunch would not be provided.

I know this may or may not be considered a wedding faux pas, but we struggled to think of things to give our guests in the long wait between our ceremony and the reception. Unfortunately, we didn’t really get a choice on the matter of when we’d be having the ceremony due to cultural reasons, so with that, we decided we would offer our guests a wine tour!

We ultimately made the decision that if guests wanted to go on a wine tour, they’d pay a small fee to do so. Those who don’t want to go on the wine tour don’t need to and we’ve given them other options (most have opted to hang out at the Crowne!). All of our guests have been pretty happy with this, so I’m calling it a win!

As for lunch, we didn’t have enough room in our budget to hold a luncheon for our guests and a reception dinner at night. It’s traditional to have sit-down dinner in Chinese weddings, and when I offered to move the wedding reception to lunch, I was stared at in horror.

So again, we’ve given our guests different lunch options and a part from some, everyone has so far been happy with it.

Travel & Accommodation

We made two separate inserts depending on whether you were overseas or in Sydney:

travel accomm insert

On the left, the Australian insert; on the right, the Overseas(OS)/New Zealand(NZ) insert. Edited for privacy purposes.

In the OS/NZ insert, we opted to use Cousin Em, Mr Big’s cousin who is also an excellent travel agent as the provided travel agent for the wedding. She’s been super awesome at booking flights and just generally helping out with the travel details for the wedding.

In the Australian insert, we had the option of a bus from Sydney to the Hunter Valley, mostly for the older guests like my dad’s friends. However, this option fell through as we didn’t get very many people wanting to take that route. All Sydney-siders will be driving up either before or on the day (which I’ll mention on my RSVP breakdown!). As such, I wanted to ensure I put the message out there to not drink and drive.

Most of them will be staying at the Crowne Plaza Resort Hunter Valley. This include both overseas and Australian guests!

I’ll document the actual resort in another post, but suffice it to say that we chose an awesome place to house our guests. It’s a five-star resort, and we managed to get a pretty incredible discount when we decided to use it for guest accommodation.

The Treasure Chest

Otherwise known as the “Wishing Well”. Because we injected my culture into the wedding, we opted for monetary gifts. I know most people deliver this sort of thing through cute poems, but I tried to make my own (and failed). Instead, Mr Big offered up the suggestion that I explain the culture behind the red envelope and why monetary gifts are so significant.

I went with it and we got this:

treasure chest insert1

On the left, for the New Zealand folk; on the right, the Australia folk.

Again, we gave one to the Kiwi/OS folk and another to the Aussie folk. The reason for the difference is:

  • Most Kiwi/OS folk will probably spend more than the Aussie folk flying over to the wedding
  • Most of the Aussie folk are actually my family, who will be giving monetary gifts anyway (as is customary)
  • We don’t really expect any gifts from the Kiwi/OS folk, but thought it’d be nice to include them in the custom

It worked for what we were doing, and so far, nothing has been said about our invitations to indicate any ill-will.

The RSVP Card

As many of our guests would be coming in from overseas, we eventually decided that pretty postcard RSVPS or RSVP envelopes would be too easy to lose in the post and went for digital RSVPs instead. This bummed me out for a little bit, but it proved to be a good idea, especially when some of the invitations had been lost in the post! We were also able to receive the RSVPs in a relatively timely manner.

Hence, when we constructed out RSVP card for the inserts, we set it out as follow:

insert_rsvp_censored

The RSVP insert. Email censored to protect Mr Big’s sanity.

Unfortunately, not all of our guests had email. These guests comprised mostly (if not all) of my parents’ friends, but these guests could report directly to my parents, who were able to RSVP for them.

Also, you may or may not have noticed my MASSIVE mistake.

The fifth (5th) of May, 2013, was a Sunday, not a Friday. So a lot of people were confused (and fair enough!). I managed to rectify the mistake by sending out texts and email to those who were confused, but most assumed the RSVP cut-off date was the Sunday (which it was).

I had also made a mistake with the email but Mr Big came to the rescue. Thank goodness he’s a computer whiz!

The Reception Card

Our reception card was pretty basic. Because we had alternate drops and our guests would be swapping meals if they so wished it, we didn’t need to state whether they wanted chicken, beef, or fish. Instead, our guests simply saw this:

insert_reception

We wanted to mention that the event required some form of “dressing up”, hence the mention at the end. It was also a nice homage to HIMYM.

So far, we haven’t heard anything negative about our invitations. We thought long and hard about what to say, how to say it, and whether or not we should do certain things in a certain way, but all-in-all, I’m pretty happy with how it’s turned out (despite the changes we made along the way!).

And with that, I’ll stop there for now!

Next up, I’ll go the ingenious way we handled the Chinese Tea Ceremony and Map inserts (which were my pet projects).

How would you feel if you received these inserts in the invitation? Did anyone else make some major mistakes in their invitations?

(All images personal unless otherwise stated.)

Part 1: The Invitation Breakdown – Outer Things!

17 Dec

I’ve been trying to figure out the best way to “break down” the invitation we made, and I think it would be easiest to start from the outside. I know invitations aren’t everyone’s ‘cup of tea’, but if you’re intending on DIY’ing your invitation and you like reading about them, then this may be one long sucker of a post about just that.

So without further ado, here’s the Bighorn invitation suite.

The Envelope

I mentioned previously that I couldn’t be arsed doing some fancy calligraphy on the invitations. Fair enough too, because a majority of our guests have either lost the invitation or just can’t be bothered referring to it. So I’m quite pleased that I didn’t spend eternity doing calligraphy. I also didn’t bother with “outer envelopes” because, 1) money, and 2) time.

Yeah, guys, I’m one of those people who aren’t very fussy on stationary.

As for what sort of envelope we chose, we had to choose from Cards & Pockets specifically because A7 envelopes don’t exist in Australia. We ended up choosing the A7 Envelope (5 ¼ x 7 ¼ Euro Flap) from Cards & Pockets in Gold.

IMG_1156

The envelopes, stamped and addressed. Not censored, because the writing is tiny and the photo quality is crap!

They don’t look great in photos – at all. They look like those manila envelopes my university uses to post me back my assignments, hahah! But in person, they’re beautiful. They have this lovely sheen to it and the grain of the envelope is just awesome.

When these envelopes are opened up, you get…

The Pocketfold

As mentioned previously, we got our pocketfolds from Cards & Pockets. We loved the idea of giving our guests a package of information for them to peruse through, especially as a lot of our guests had never been to a destination wedding (and a lot of them are frightened of the prospect too).

In order to do this, we used the Signature Pocketfold from Cards & Pockets in Jupiter.

jupiter pocketfolds

The Signature Pocketfold in Jupiter.

It provided a beautiful backdrop for the invitations and inserts I had designed over Photoshop (with the help of my magnificent Friend A). When folded up, we fastened it with envelope seals from Vistaprint (which I got for relatively cheap with a voucher!).

censored outer pocketfold

Sorry for the censor guys!

I wanted to add a stamp of a cherry blossom tree, but couldn’t find anything that was both, 1) appropriate, and 2) affordable (uhm, $20+ for a stamp, no thanks). So I nixed the idea and decided to keep it simple.

Especially as, when opened up, the rest of the invitation was information heavy

The Main Invitation

We made sure out main invitation was the first thing the guests would see:

invitation_proof_inner

When the pocketfold is opened.

On the other side were our mini-essays (AKA inserts). We also placed a Chinese sticker on the base of the pocket to give it some character.

Our main invitation (obviously) has personal details, so I won’t share the original. I will, however, share the Weddingbee version I made!

main-invitation

The main invitation!

My Chinese heritage is playing a huge part in the planning of our wedding. So Mr Big and I wanted to pay homage to that in the invitations. I wasn’t too sure where to start, but then the idea of ‘cherry blossoms’ tickled my fancy. However, cherry blossoms are more Japanese then Chinese.

“Plum” blossoms  – which are white – are more Chinese oriented.

plum blossoms

Plum blossoms. / Image via Wikipedia.

However, I know that a lot of my traditional relatives would just about have a heart attack at a “white invitation” (for those who don’t know – white is the colour of death in Chinese culture), so I decided to stick with my guns and go with cherry blossoms.

In all honesty, it turned out beautiful and I’m glad I went with it! 🙂

We decided that, because our parents are contributing quite significantly with our wedding, we’d place them into the main invitation. We originally wanted to put individual names on the invitations, something Mr Big was a goer on, however, short of writing out the names on individual invitations before printing (which would’ve driven me and the people of Cards & Pockets insane), we decided against it.

I wanted to make it easier for guests to find the location on our map, so I put in a reference point. I’m not exactly sure how many people have actually used it (or will even be bringing the map with them!) but I thought it was a nice touch.

As usual, I ended with our wedding logo, which capped it off nicely.

And I think I’ll end it there before this post gets too long! I’ll talk to you more about the inserts in the next post! I also have two pet projects I want to tell you guys about.

Anyone else give their guests an “invitation essay”?

(All images personal unless otherwise stated.)